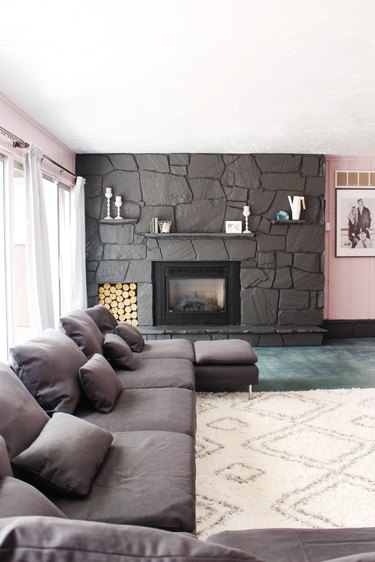
Sometimes an old fireplace, whether brick or rock, can throw off the whole look and feel of the room. Even with other updates, a red or yellow fireplace can still make the space feel outdated. So, why not give it a quick, modern update with paint? It's really easy, and using the right kind of paint will ensure that you get perfect adherence that should require little upkeep in the future. Giving the focal point of your room this kind of update could be all you need to make the whole space feel like new!
(Psst–like the look of the floor in these photos? Find out how to DIY acid stain a concrete floor here!)
Video of the Day

Things You’ll Need
-
Paint: satin or higher gloss finish with primer added
-
Primer (if none is in your paint)
-
Paintbrush
-
Paint roller
-
Washcloth
-
Protective coating (optional)

Step 1: Clean Your Fireplace
First make sure your fireplace is clean and free of any debris that will obstruct the paint from adhering.
Go over the fireplace with a dry washcloth to remove loose dust and debris, and then wet the washcloth and go over it again. Use any cleaning agents that you might need to remove more dirt.

Step 2: Paint the Fireplace
Choosing the right paint is essential to make this process as easy as can be. Any sheen that is more flat than satin will not stick to the rock as easily and will flake and chip off. Choose satin, gloss or high gloss to get really powerful adherence. Additionally, choose a paint that has a primer in it to cut down on a whole step, which, with a project like this that has many dips and divots, will be essential.
Paint with the roller first. Often times, just dipping and turning the roller into the divots of the rock will get to the hard-to-reach places, so take your time to get these spots.

Tip
Always go over your fireplace first with a paint roller. You will be surprised how much area you’ll be able to cover with the roller and it will save you a lot of time in the end with the brush work.
Now go into the dips, divots and cracks with a brush that is small enough to get into the cracks easily. You may be tempted to use a larger brush but will inevitably save time by using the smaller size, with stiffer bristles, that can fit everywhere.

Step 3: Paint Your Final Coats
If you have chosen a darker color of paint than the original rock, you will probably only need one coat of paint. But if you are going lighter, it may be necessary to apply a second coat. Again, do this with the roller first.
Give your fireplace a good looking over because it is likely you'll find little areas that didn't get painted, or where drips of paint may have moved. If you find spots like these, touch them up as needed with your paintbrush.

Step 4: Apply Protective Coating (optional)
If you're not happy with the sheen of your project after it's complete, applying a sealant or coating can change that. Polyurethane comes in multiple finishes and will give extra protection as well, if you feel that is necessary. Brush or wipe on the coating according to the manufacturer's instructions.


This space was so transformed by the new color of rock, it's almost unbelievable! An old fixture that has been in the home for over 50 years looks almost brand new, and definitely more modern.


More Home Improvement Projects That’ll Update Your Space
How to Acid Stain a Concrete Floor

How to Easily Apply Paint Over Hard to Remove Wallpaper

Painting Interior Brick Walls


