Things You’ll Need
-
2-by-4 lumber, untreated
-
Pencil
-
Stud finder
-
Screw gun
-
3-inch screws
-
Hammer
-
Saw
-
Drywall
-
Base molding
-
Finish nails
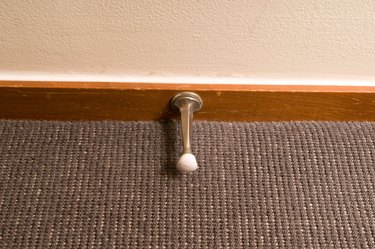
 Often, it is not possible to distinguish between wall that were built before the carpet was installed and walls that were added after. Image Credit: Jupiterimages/Photos.com/Getty Images
When adding a wall into an existing finished room, it is often desirable to leave the option of removing the wall at a later date. When the room has carpet already laid down, the only way to build the wall so that it can be removed without problems is to place it on top of the carpet. Doing so is not a problem and many builders will get the results they desire.
Video of the Day
Step 1
Mark out where you want the wall to be. Make marks on the ceiling and floor for exactly where the top and bottom of the wall will be. Ensure that your marks form a plumb and level line. Use a chalk line across the floor of where you want your wall to be. Use the chalk line to measure up from the floor to the ceiling so the top and bottom plate are aligned.
Step 2
Cut the top and bottom plates from the 2-by-4 lumber. Hold the plates side-by-side and mark the placement of the studs using a pencil. The first stud on each side will be off set by 3/4 inch. Make marks every 16 inches for the studs.
Step 3
Attach the top and bottom plates. Using a stud finder, locate the joists in the ceiling and screw 3-inch screws every 16 inches through the ceiling into the joists to attach the top plate. Screw the bottom plate into the floor through the carpet using 3-inch screws placed every 16 inches. If the carpet is laid on top of concrete, you will need to use a masonry bit to pre-drill the screw holes.
Step 4
Cut and install the studs. Cut each stud to fit exactly between the top and bottom plates and tap it into place with a hammer. If your measurements are off or you are unable to correctly hammer it into place, use wood shims or bracing brackets to join the top and bottom plate with the studs and fill the gap. Depending on the length of your wall, you will generally have one stud touching each conjoining wall. In some cases, there will be a space. Do not move the stud to accomodate this odd space, as your drywall won't align if you do. Just keep the spacing 16 inches apart and leave the odd space along if it occurs.
Step 5
Install the studs along the marked lines on the top and bottom plate. Use toe-screws so that the top and bottom on every stud each have two, 3-inch screws at an angle passing through about 1 inch from the end of the side of the stud and coming out where the stud and plate meet fastening the two together.
Step 6
Finish the wall. Install drywall to the studs with 3/4-inch drywall screws. Ensure that the drywall rests approximately 1/2 inch above the level of the carpet. Hide the gap by installing base molding pushed firmly into the carpet before being nailed into place with finish nails every 10 to 12 inches.
Tip
Don't worry about the structural stability of this wall. Since it's a partition wall it is not load bearing.
Warning
Treated lumber is only for exterior and ground contact applications. Do not use treated lumber inside your home.


