


I love a great glass bottle repurposing project, and this one might just be my favorite. Decorative, utilitarian, and cheap = win, win, and BIG win. You can also customize these sturdy (not-so-easily-knocked-over) concrete tabletop torches to your liking and to the materials you happen to have on hand. Make 'em tall, short, simple, or embellished — whatever works for your taste and space.
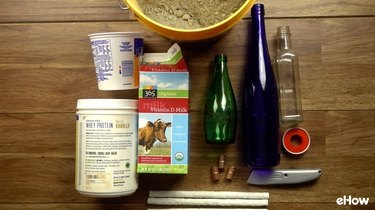
Things You’ll Need
-
Empty disposable plastic or paper container(s) to use as concrete mold(s) — (like a milk carton, ice cream carton, large yogurt container, large plastic jar, etc.)
-
Empty glass bottle(s)
-
Concrete mix (I used Fast-Setting Quikrete)
-
Non-stick cooking spray
-
Copper coupling (1/2 inch x 3/8 – 3/4 inch — depending on size of your bottle opening)
-
Nylon thread-seal tape
-
Utility knife (or other sharp-bladed tool)
-
Tiki wicks
-
Funnel
-
Tiki fuel
-
Paint (optional)
-
Hobby wire (optional)
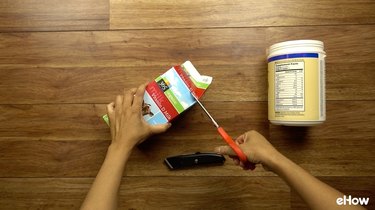
Step 1: Prepare Your Mold(s)
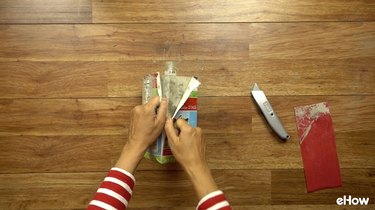
Cut off the portions of your plastic/paper container(s) that you won't be using to shape your concrete base. Use scissors and/or a utility knife, depending on the material you're cutting. For example, I chose a milk carton and a cylindrical plastic container, so I removed the spout portion of the milk carton above the crease as well as the narrower, threaded top portion of the plastic container.
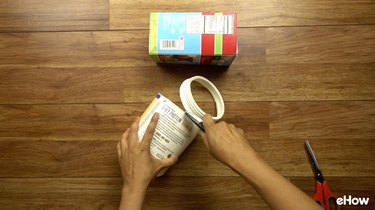
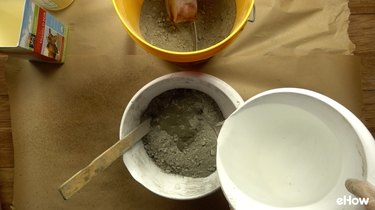
My molds after cutting:

Finish prepping your molds by spraying the inside with non-stick cooking spray that will act as a release agent.
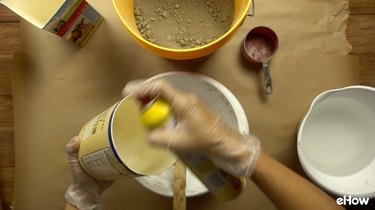
Step 2: Mix Concrete
Add water to concrete, creating enough mix to fill your mold(s) to a little below the desired level. Remember that when you insert your bottle into the mold, the concrete level will rise.
Tip
If you've chosen quick or fast-setting concrete and you're making multiple torches as once, you may want to mix only enough concrete needed for one torch at a time. This will give you enough time to work on each torch without fear of your mix hardening before you've completed molding all of your torches.
Step 3: Fill Mold(s)
Pour the concrete into the mold.
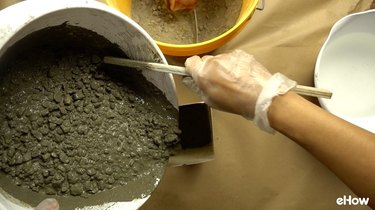
To force out bubbles that may be trapped within the wet concrete, hold the mold at the edges and jiggle it vigorously. This will also level out the surface. Since I wanted some bubbles to remain (for a rougher, more organic look), I kept the agitation to a minimum. If you want a smoother, bubble-free surface, jiggle away! You'll know to stop when you no longer see any bubbles rising to the surface.
Tip
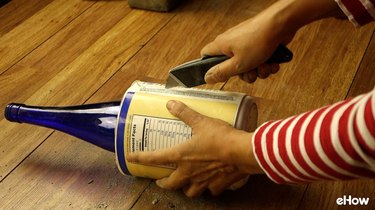
For a quicker, more efficient way to remove bubbles, lightly run an electric sander (without sanding paper) along the outside of your mold.

Step 4: Insert Bottle and Let Set
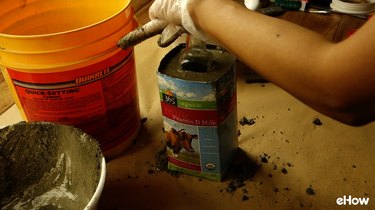
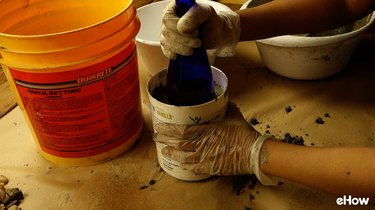
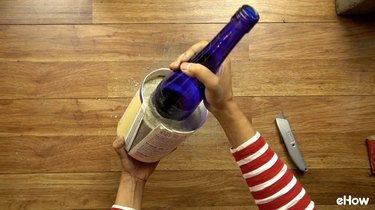
Insert the bottle into the concrete and push down firmly, submerging it as deeply as you'd like. If needed, place something heavy atop the bottle (such as an inverted ceramic bowl with rocks or a weighty can of food on top) to keep the bottle in place as the concrete sets. I didn't find this necessary as the fast-setting concrete gripped and held the bottle in place fairly quickly.

Repeat for all other molds, if any. (See tip in step 3 above.)
Allow to set completely — around 24 to 48 hours.

Step 5: Remove Molds
Once the concrete has set, remove the molds. If your mold is paper such as a milk or ice-cream carton, you should be able to easily tear it off, beginning at the carton's side seam (see below.)
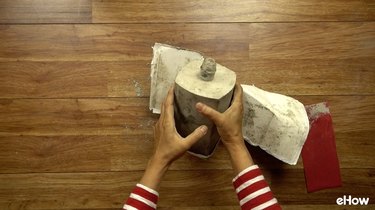
If plastic, use a utility knife to slice a groove down the side which you can then pull apart. Make sure not to pierce too deeply to avoid cutting into the concrete. However, if you do slice into the concrete, you can easily sand out the surface to smooth.
Step 6: Assemble Wick Holder
You're now going to create a wick holder out of your copper coupling and nylon thread seal tape. The narrow end of the coupling should measure 1/2 inch in diameter to hold the 1/2-inch tiki wick in place, and the other end should be only slightly smaller than the opening of your particular bottle (see tip below).

Tip
To ensure that you get the right-sized coupling for your torch, we recommend you bring your bottle to the hardware store to try the various couplings on for size. You won't need an exact match, as you'll use nylon thread-sealing tape to seal any gaps between the coupling and the bottle opening to create a snug fit.
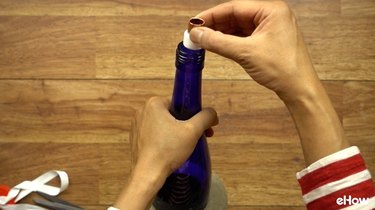
Wrap enough thread-seal tape around the bottom end of the copper coupling so that it fits snugly and securely into the bottle opening.
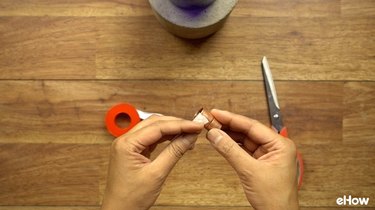
Test it for fit as you're wrapping — adding or removing tape as needed. Take care not to push too hard to avoid the coupling from falling into the bottle.

Once you've ensured the fit, remove it and insert the wick so that approximately no more than one inch protrudes from the top end of the holder.

Step 7: Optional Embellishment Ideas
Like things simple? Then you can skip this step. Think more is more? Then go ahead and get fancy! I chose to use some metallic spray paint and copper wire to gussy up my milk-carton torch, as shown below.
 Optional: mask the area you want to leave unpainted using painter’s tape and paper. Image Credit: Maya Marin
Tip
You can use regular spray paint if you plan on storing your torches when not in use, but if your torches will be fully exposed to the elements, we recommend that you use an exterior latex paint for greater durability.
 Optional: apply paint Image Credit: Maya Marin
I also chose to wrap some copper hobby wire around the neck of the bottle for a decorative effect. Metal and concrete are always a winning combo!


Step 8: Add Fuel
Using a funnel, add enough tiki fuel to reach the bottom of the tiki wick. Remember to read and observe the safely instructions on the fuel bottle.

Insert the stopper/wick into the bottle and voilà — your brand new concrete torch is ready to illuminate your outdoor space!

For ideas and inspiration, check out the contrasting pair of torches below.
 Materials: cobalt blue wine bottle and cylindrical plastic food container. Image Credit: Maya Marin
I'm really loving the color combo of the gray concrete with this cobalt blue wine bottle. I also dig the textural contrast between the smooth glass and rough concrete.
 Materials: 8-inch clear glass bottle and milk carton. Image Credit: Maya Marin
For the one above, I wanted concrete and copper to be the stars of the show, so I used a shorter clear bottle (originally for hot sauce) and poured enough concrete into the milk carton mold so that only only a small portion of the bottle neck was visible. Then, I accented with copper-colored metallic paint and copper wire.
If you make your own customized torches, please make sure to share your creations with us!

Warning
To avoid serious harm to yourself and your property, please familiarize yourself with these general Tiki torch safety tips before enjoying your DIY torches.


")


