 “Draw steam engines to create your own train yard full of hard-working engines.Publications International, Ltd.
Choo-choo! Every kid loves a steam engine – and lots of grownups do, too. Use our easy instructions to draw your own steam engine, or an entire train yard full of them.
In this article, we’ll show you how to draw the above steam engine. Either draw it freehand while looking at your computer monitor or print out this page to get a closer look at each step.
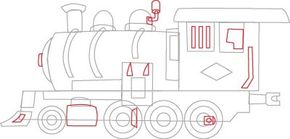
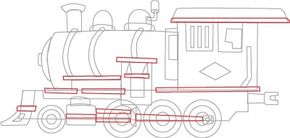
Follow the red lines in each illustration to learn exactly what to draw in that step. The lines drawn in previous steps are shown in gray. Here, we’ll show you an illustration of each step and then give you a description of how to draw it.
Ready to get started? Head over to the next page for the first step.
Contents
- 1. Draw the Cab Section
- 2. Draw the Bells and Cowcatcher
- 3. Add the Windows
- 4. Draw the Wheels
- 5. Add Detail to the Windows
- 6. Add the Piston Sections
- 7. Add the Final Touches
1. Draw the Cab Section
 “
“
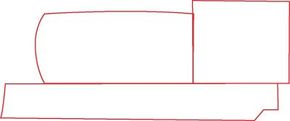
Draw a square for the cab section of the steam engine. To the left of the cab, add a long rectangle with a curved front. Sketch a long rectangular shape (with a notch toward the back) for the bottom section.
We’ll continue work on the cab on the next page.
2. Draw the Bells and Cowcatcher
 “
“
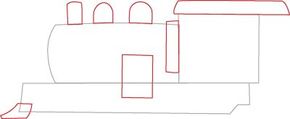
Draw two curved half-ovals on top of the front section to create bells. Sketch a curved rectangle to form the cab’s roof. Add a rectangle toward the front of the engine to create the smokestack. Draw other rectangular details on the side. Add a curved wedge shape to the front.
On the next page, we’ll add the windows.
3. Add the Windows
 “
“
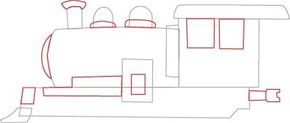
Just above the wedge, draw a slightly angled rectangle. Draw two rectangles for the cab windows. Add more rectangles for details on the engine side. Draw a small curved rectangle at the bottom of each bell. Add an arched shape at the front of the car and at the top of the smokestack. Add rectangular shapes at the back end to create the device that links train cars together.
On the next page, we’ll add the wheels.
4. Draw the Wheels
 “
“
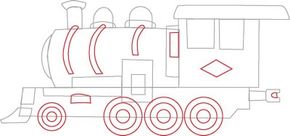
Draw four wheels — three large ones toward the back end and one smaller one at the front end. Sketch three curved bars on the boiler section to add detail. Add a diamond on the side of the cab and a few more rectangular details. Sketch a half-oval on the linking unit at the back of the car.
We’ll add some detail to the windows on the next page.
5. Add Detail to the Windows
 “
“
Add bars to the front cab window and a squared shape to the back window. Sketch a whistle coming off the bell closest to the cab. Draw a rectangle between the front and back wheels and some other detail shapes by the wheels to start forming the piston section. Add a wedge on the scoop and a rectangle on the front of the car. Add a few more shapes for details on the side of the engine.
On the next page, we’ll work on the piston sections.
6. Add the Piston Sections
 “
“
Sketch several long, thin rectangles to finish the piston sections, roof, and structural details on the engine’s side.
We’re almost done. We’ll finish our drawing on the next page.
7. Add the Final Touches
 “
“
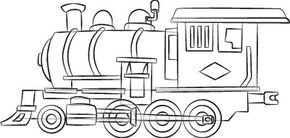
Trace the pencil lines you want to keep with a felt-tip pen. Erase any extra lines. Use a clean eraser to remove pencil lines. This helps avoid pencil smudges on the paper.
Once you’ve mastered steam engines, your engines will need some freight to haul. Continue to the next article, where you’ll learn to draw boxcars to go with your steam engine.
See all How to Draw articles.


