


Ditch the cardboard six-pack and customize your own wood beer caddy to tow your brews in style. This six-pack carrier is complete with a wall-mounted bottle opener so you can enjoy a cold one as soon as you reach your destination.
Wood Beer Caddy Image Credit: Photo: Cameron Oden
Video of the Day
Things You’ll Need
-
¼ " Pine Lattice
-
¾ " Self Tapping Screws
-
Brad Nailer
-
Wood Stain
-
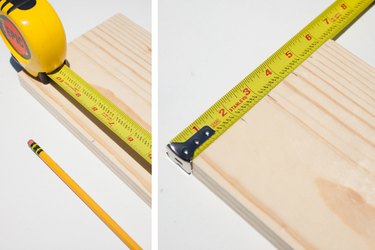
Tape Measure
-
¾ " Dowel
-
Miter Saw
-
Wood Glue
-
1 ¼ " Brad Nails
-
Nylon String
-
220 Grit Sand Paper
-
Wall Mounted Bottle Opener
-
¾ " Brad Nails
-
¾ " Pine Board
Cutting and Assembling The Beer Caddy
Step 1
 Materials layout. Image Credit: Photo: Cameron Oden
Using your miter saw, measure and cut the following pieces to length:
A (2) – ¼ " x 2 ½" x 6" B – ¼ " x 2 ½" x 9" C – ¾ " x 9 ½" D (4) – ¼ " x 1 ¼ " x 10 ½" E (2) – ¼ " x 2 ½" x 10 ½" F – ¾ " x 6" x 9" G (2) – ¾ " x 6" x 12"
Step 2
 Measuring for angle. Image Credit: Photo: Cameron Oden
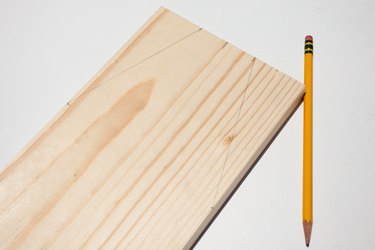
Take your two 12" "G" pieces and mark 7" up from the bottom on both sides and 1 ⅛" from center on each side on top
Step 3
 Completing your angle. Image Credit: Photo: Cameron Oden
Connect your two marks to determine the angle.
Step 4
 Making miter cuts. Image Credit: Photo: Cameron Oden
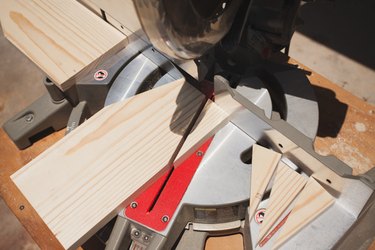
Match your miter saw to the angle and make your cuts.
Step 5
 Notching wood on miter saw. Image Credit: Photo: Cameron Oden
Notch halfway down on the center of your two "A" pieces and make two notches in your "B" piece halfway at 3" and 6" so they can fit together.
Step 6
 Checking the fitment. Image Credit: Photo: Cameron Oden
Be sure to check your fitment — this is what will hold your beer in place.
Step 7
 Drilling a ¾" hole for the handle. Image Credit: Photo: Cameron Oden
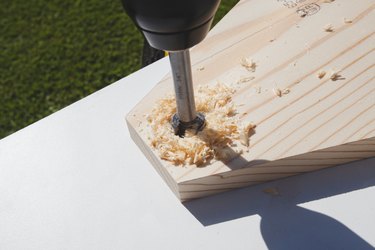
Using a ¾" Forstner bit, drill a hole 1" down from the top of your two "G" pieces being careful to only drill approximately ½" in and not piercing through the other side.
Step 8
 Attaching the side piece. Image Credit: Photo: Cameron Oden
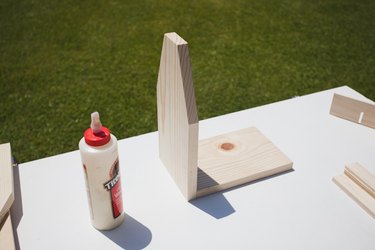
Apply a thin bead of wood glue to the first 12" "G" piece and attach to "F" (the base) with 1 ¼" brad nails.
Step 9
 Attaching opposite side piece. Image Credit: Photo: Cameron Oden
Apply a small amount of glue and insert your ¾" dowel into the side you just attached.
Step 10
 Sides attached with wood glue and nails. Image Credit: Photo: Cameron Oden
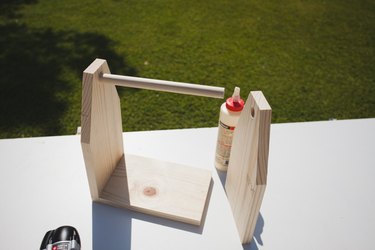
Apply a small amount of glue to the remaining side. Insert the dowel and secure the base with 1 ¼" brad nails.
Step 11
 Glueing the divider in place. Image Credit: Photo: Cameron Oden
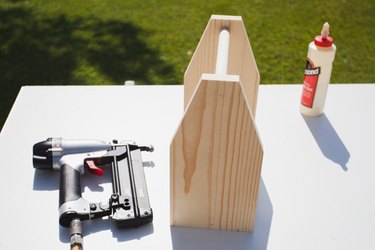
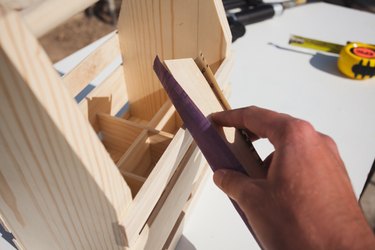
Take your notched "A" and "B" pieces and apply glue to the joints and the bottom being careful to align it in your completed base.
Step 12
 Attaching the wood slats on the outside. Image Credit: Photo: Cameron Oden
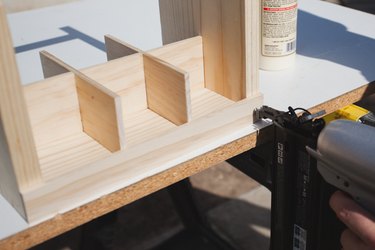
Take one of your "D" pieces and apply a small amount of glue to both sides and fasten with a ¾" nail on both sides. Repeat on the other side.
Step 13
 Measuring equal distance between slats. Image Credit: Photo: Cameron Oden
Using your tape measure, mark the following "E" and "D" pieces ¾" apart. Glue and fasten with ¾" nails.
Step 14
 Removing rough edges. Image Credit: Photo: Cameron Oden
Sand any rough edges with 220 grit sand paper.
Step 15
 Finished assembly. Image Credit: Photo: Cameron Oden
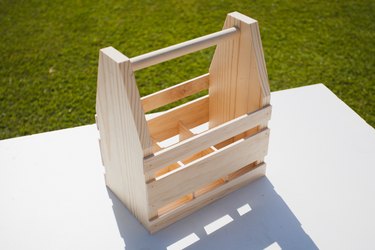
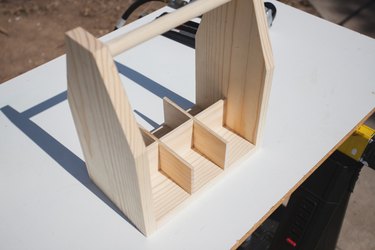
Assembly is complete!
Finishing Touches
Step 1
 Choosing wood finish. Image Credit: Photo: Cameron Oden
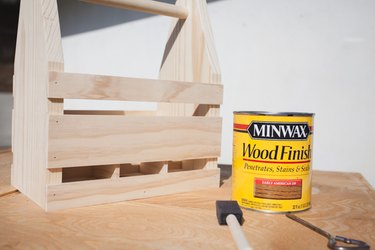
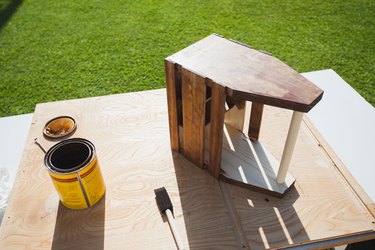
Wipe the wood clean with a damp cloth. Let dry and choose your finish. Minwax Early American was used in this project.
Step 2
 Applying stain Image Credit: Photo: Cameron Oden
Apply stain evenly, following the directions on the can. Make sure to get inside and cover all the surfaces.
Step 3
 Attaching wall-mounted bottle opener. Image Credit: Photo: Cameron Oden
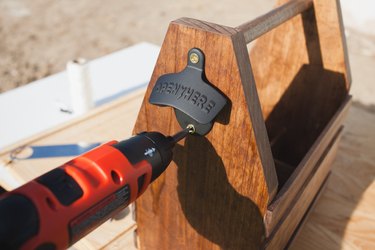
Using self tapping ¾" screws, attach a wall-mounted bottle opener. I found mine at my local bottle shop.
Step 4
 Wrapping nylon handle. Image Credit: Photo: Cameron Oden
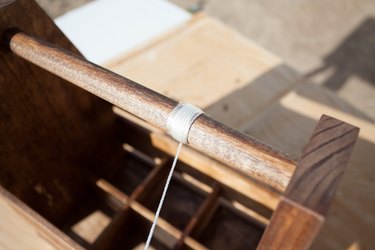
Take your nylon string and begin neatly wrapping the handle. This is optional, but a nice addition.
Step 5
 Adding nylon sting to the handle. Image Credit: Photo: Cameron Oden
Once you reach the end, cut and tie it off.
Step 6
 Completed wooden beer caddy. Image Credit: Photo: Cameron Oden
Pick up some beer from your local bottle shop and enjoy your work.
Step 7
 Wooden beer caddy in two finishes. Image Credit: Photo: Cameron Oden
Now that you've mastered the art of making beer caddies, make one for a friend. Experiment with different finishes — the one on the left has a charred finish for a rustic look.
Step 8
 Beer caddy details. Image Credit: Photo: Cameron Oden
Use details that contrast for a striking look.


