Plant lady is the new cat lady! Having a home full of plants is not only an easy way to make your space look gorgeous, but it can also boost your interior's air quality. There are many benefits to keeping plants in your home, so now all you have to do is figure out where to put them!

Video of the Day
Pots look great on shelves and window sills, but if you don't have a lot of space (or if you've already filled it up), a great way to add more plants is to make hanging planters or plant stands. Sometimes, the planter needs to be just as cute as the plant (who am I kidding — it always does!). This mid-century modern-inspired hanging teardrop planter is a great addition in any room.

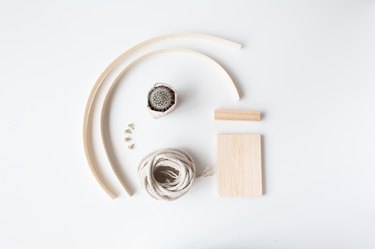
Things You’ll Need
-
Flat reed for basket making
-
Square dowel
-
Hammer
-
Upholstery pins
-
Square wood strip
-
Rope
-
Shelf bracket
-
Plant

Making the Frame
Step 1
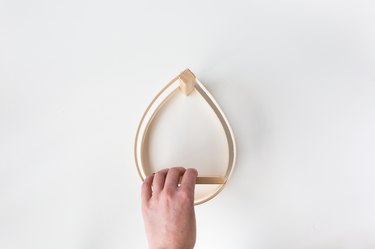
Using a hammer, secure two ends of the flat reed to the square dowel. Line up the ends of the reed with the ends of the dowel and hammer in an upholstery pin through the reed and into the dowel.

Step 2
Wrap the reeds around three sides of the square dowel so that both the ends of the reed now touch at the top of the teardrop shape. Hammer upholstery pins to secure in place.


Step 3
In the teardrop you should now be able to balance the square wood strip as a plinth. You can add a little glue to secure it in place if it sits unevenly.

Hanging the Planter
Step 1
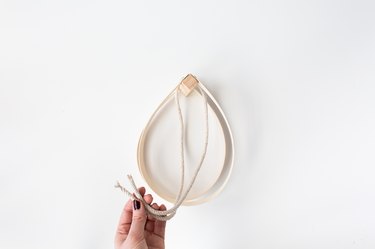
Cut two lengths of rope the same size — double the length you would like it to hang. Wrap both ends around the top of the square dowel and bring them up through the center of one teardrop.

Step 2
Pass the ends through the loop at the top of the dowel and pull tight.


Step 3
Repeat this step through the other teardrop and tie all the rope ends together.

You can now hang the planter wherever you wish! I've used a shelf bracket to put hang it from and frame this cute little cactus!


